 How to put on eyeliner perfectly

Eyeliner is a crucial part of any makeup bag for every woman and one of the most important items in your makeup bag. Eyeliner is the key to giving your eyelashes a fuller, thicker, and healthier look as well as a nice boost to make them the focal point of your face. It can be said that the eyes are the windows to your soul, and the right eyeliner can works wonders!
When it comes to choosing an eyeliner, there are a range of different types ranging from liquid eyeliner to pencil eyeliner and colors like black, brown and blue and this can effect the application of your eyeliner. Applying eyeliner to your eyes is easy once you know how – follow this easy step-by-step guide to apply eyeliner and get the look you want.
Step 1: Choose the Correct Eyeliner
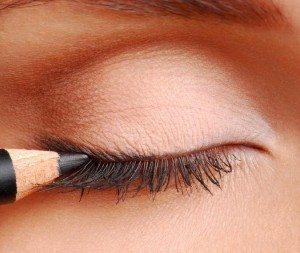
Pencil Eyeliner- Pencil eyeliners are very easy to use – they come in the form of a pencil and are are applied by simply drawing a line along the upper or lower lid of the eye. Pencil eyeliners are the best choice for creating a smudgy, smoky look and need to be slightly blunt to get this right. If your eyeliner pencil is sharp, press the tip into a tissue until the tip becomes flatter, making it easier to apply.
Cream / Liquid Eyeliner- Cream or liquid eyeliners are the other type of eyeliner found on the market and are used to create a svelte look without any smudging. Liquid eyeliner is slightly more difficult to use than pencil eyeliner and takes some practice, but once mastered, liquid eyeliner can create an incredible look. Liquid eyeliner can be used to create dramatic looks like sweeping ‘cat eyes’. Cream eyeliner is probably the most difficult type of eyeliner to apply as this involves using a very fine brush and dipping it into a pot of cream eyeliner and ‘painting’ the eyeliner onto the eyelid. This requires a very steady hand if you are wanting a smooth line.
Extra Tip: How to make your EYES LOOK BIGGER and attractive with makeup
Step 2: Choose the Correct Color
When it comes to choosing the color of your eyeliner, it is best to choose a color that complements your eye and hair color. The two main colors of eyeliner are brown and black, while blue also makes an appearance. Brown eyeliner is softer and creates a subtle look, while black eyeliner is more stark and is used for a more dramatic look. If you have blonde hair, go for brown eyeliner, while brunettes and dark-haired women should choose a black eyeline. Avoid blue or green eyeliner as this is rather a dated look – think the 80s!
Step 3: Get Comfortable
The first step to applying eyeliner is to get comfortable. Stand in front of the mirror and if you can, rest your elbows on something. Use your non-writing hand to lift or pull your eyebrow up and pull the skin around your eye taut so that you have a smooth surface on which to work – like an artist’s palette. Try to keep the skin as tight as possible while applying the eyeliner as this makes it easier to apply.
Step 4: Define the Dotted Line
Upper Eyelids- Draw small evenly-placed dots along your upper eyelid as close to your eyelashes as possible from the corner of your eye towards the end of your eye. This will create a path of dots to connect, making your eyeliner application easier than if it was a straight line.
Lower Eyelids- Applying eyeliner to your lower lids is easier than the upper lid. Simply pull your lower lid taut as with the upper lid and draw a line of eyeliner along the ridge of your lid. Be very careful not to get eyeliner in your eye as this can sting. Pencil eyeliner is better for lower lids as there is less risk of eyeliner running into your eye.
Step 5: Connect the Dots
Next step is to connect the dots in straight lines as close to the eyelid as possible. The main function of any eyeliner is to work together with the mascara to give your eyelashes a fuller, thicker look, so be sure to try and get the eyeliner as close to the base of the eyelash as possible. The thicker you want your eyelashes to look, the thicker the line of eyeliner needs to be.
Step 6: Add the Finishing Touches
Once all the dots have been connected, you should have a beautiful, smooth line of eyeliner across the upper and lower lids of your eyes.
Extra Tip: Learn how to APPLY MASCARA perfectly without smudging and how to fix most common mascara mistakes.
Smooth Look- If you want a smooth, svelte look without any smudging, dip a cotton bud into some warm water or a bit of makeup remover and remove any marks or blurred lines.
Smudgy/Smoky Look- If you are looking for a smoky/smudgy ‘red carpet’ look, it is best to use pencil eyeliner as opposed to liquid eyeliner. Go through the same steps as above for the application of eyeliner for a smooth look, but once the dots have been connected and you have the thickness of eyeliner you desire, take a dry cotton earbud and gently smudge the eyeliner to create a smoky look. This can also be done on the bottom eyelid for an extra striking appearance. Take care when creating a smoky/smudged look – go for more smudge on the upper lid than the lower lid as too much smudge on the lower lid could risk creating ‘bags’ beneath your eyes, which is the last look you want!


")


